
This month, I learned how to make a few different types of fire catchers. If you’ve been following my blog recently, you know I’m attempting to learn a different survival skill each month (for research purposes and because it’s just plain fun). Well…what’s more useful than fire? It’s humankind’s most basic tool for eating, keeping warm, sterilizing water, and perhaps sterilizing a wound. But what if you run out of matches? What if you need to rely on a primitive methods like striking flint against steel or the bow drill method?
In that case, things get a little more complicated. A spark created from flint and steel might only last for a second, as opposed to the several seconds you get with a match. If that precious spark doesn’t land on something highly flammable, it will simply fade away. The trick is to catch it.
NOTE: The items I’m about to describe have been called “fire starters” by some, but I think that’s a misnomer. They don’t actually start the fire; what they do is catch and nurture it. They play an important role in turning a spark into a flame.
The best fire catchers are light, compact, weather-proof, and (this should go without saying) highly flammable. I looked into three basic methods, but I know there are more out there (a Q-tip dipped in Vaseline, for instance, or certain foliage). Of the three, I tried making two. Let me give you the basic rundown of each…
Method #1: Wax-Coated Cotton Pad Fire Catcher
This turned out to be my favorite method. Essentially, you coat cotton in wax, which creates a waterproof disc that can be used to catch fire. If the wax on the outside becomes damp, simply snap it open and expose the dry middle. It’s brilliant. If you watch the video below, you’ll see a demonstration of the wax-coated cotton pads’ waterproof nature.
I basically followed this guy’s instructions (great, basic video):
Supplies Needed:
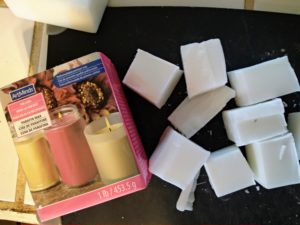
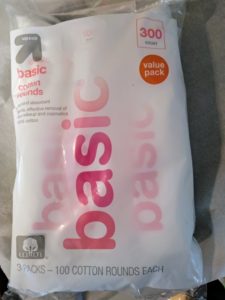
- Cotton pads
- Wax (find candle-making wax at a craft store or melt down candles)
- Either a pan you don’t care about or a large glass jar you don’t care about (to use as a double boiler)
- Tongs you don’t care about
- A heat-resistant glove or hot pad
- A knife and cutting board
- Wax paper
Steps:
- Lay out your cotton pads on wax paper with a little space between each one
- Cut down your wax so it’s small enough to fit in your jar (I cut mine into small blocks, but shaving it into slivers would probably help it melt faster)
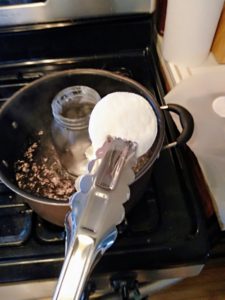
- Melt wax in either A) A pan you don’t care about or B) A glass jar sitting in hot water (i.e. a double boiler). I used method B)
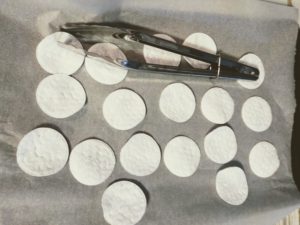
- Take your tongs and fully submerse a cotton pad in the wax. Hold the jar with a hot pad or heat-resistant glove so it doesn’t move around. Allow the excess wax to drip from the pad back into the jar (no need to get too picky)
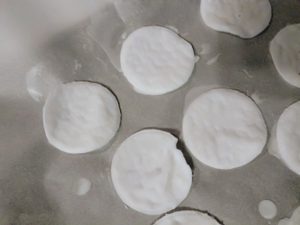
- Place the wax-coated pad on your wax paper and allow to dry.
- Store in a cool dry place, like a tupperware container in the basement
Here is a visualization of the steps:

See how easy that was! Onto the second method:
Method #2: Lint, Wax, TP Tube Fire Catchers
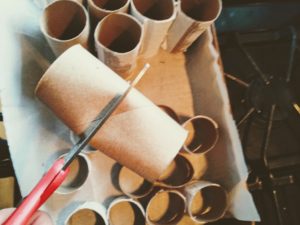
This method follows the same idea as the first, but is considerably messier. It also seems to take more wax. In a nutshell, you stuff old TP cardboard tubes with dryer lint and pour melted wax over the lint (on both ends). I made shorter tubes and taller tubes.
This is the video I used as a guideline:
Supplies Needed:
- Cardboard TP or paper towel tubes
- Scissors
- Dryer lint
- Candle wax
- Knife
- Either a pan you don’t care about or a glass jar, used in boiling water
- A heat-resistant glove or hot pad
- A wax-paper coated pan
Steps:
- Cut your TP tubes to the height you’d like (I tried halving them and cutting them into quarters–I like the smaller ones better)
- Arrange the TP tubes in a wax paper-coated pan
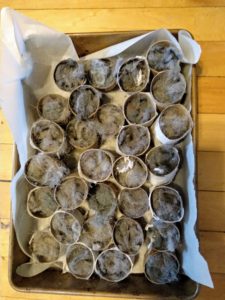
- Stuff your tubes full of dryer lint (pack it fairly tight)
- Cut down your wax so it’s small enough to fit in your jar
- Melt your wax in either your junky pan or inside a glass jar that’s sitting in boiling water
- Using your hot pads or gloves, remove the jar from the boiling water and pour the melted wax over top of each tube so it’s thoroughly coated
- Let the wax dry and flip over the tubes
- Pour wax on the other side
A few pictures of the supplies/steps (the dryer lint is admittedly VERY unattractive!):

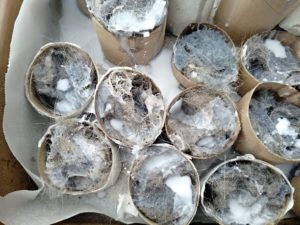
A variation of this method is using egg cartons instead of TP tubes. I think that method would work better, as some of the wax seemed to escape out of the bottom of the tubes.
Method #3: Char cloth
I didn’t have an Altoids tin at my disposal, so I wasn’t able to try making char cloth yet. However, it seems very straight-forward, and I know people swear by it. So. I will have to try it out soon, likely following the steps outlined by Crazy Russian Hacker (one of my favorite survivalist/random experiments YouTube channel. His accent is priceless):
Supplies Needed:
- Altoids tin
- Washcloth, cut to size of tin
- A hammer and nail (or some other way to poke a hole in the top of the tin)
- A camp stove
Steps:
- Create a hole in the top of your Altoids tin
- Place your cut washcloth inside the tin
- Turn on your camp stove full blast and set the tin directly on the flames with the hole facing up
- Let it go for 15 minutes or so, until there is no longer fire coming out of the top hole
That’s it! Simple, right?
Mary “Pyro 2” Shideler uses denim for her char cloth instead of a washcloth. I’ll have to try both mediums and see if there is a difference.
That’s all for now, folks! Tell me:
Have you ever made a fire catcher/fire starter? What did you use? How did it work?
Until next time, have fun (but not too much fun) playing with fire!
Author: KateBitters
Kate Bitters is a Minneapolis-based author and freelance writer. She is the author of Elmer Left, Ten Thousand Lines, and He Found Me. One of her proudest/nerdiest moments was when Neil Gaiman read one of her short stories on stage at the Fitzgerald Theater.